ClearPass
The BYOD ClearPass Screen displays all configured ClearPass Policy Manager (CPPM) Servers and is used to configure the connection to the CPPM Server, configure the CPPM server as a RADIUS Server, and assign the CPPM server to switches on the network. The screen is also used to edit and delete servers. Once the CPPM Server is configured, you can also launch the ClearPass Policy Manager Web interface by selecting a server and clicking on the Launch button.
ClearPass provides Bring Your Own Device (BYOD) access to the network. The Alcatel-Lucent Enterprise BYOD solution integrates with ClearPass Policy Manager (CPPM), using the RADIUS (RFC 3576) Change of Authorization (CoA) to achieve this functionality.
OmniVista supports some portions of the configuration to facilitate the solution, including:
- Providing access to end device information from CPPM using Locator.
- Pairing CPPM and switches to enable RADIUS authentication request/response and RADIUS CoA messages between switches and CPPM.
- Setting up authentication servers for 801.1x, MAC, and Accounting Servers on switches to point to the CPPM Server.
- Enabling switches to accept a Redirection URL contained inside the returned RADIUS message so that HTTP/HTTPS traffic can be redirected to a guest registration/onboard portal.
- Enabling switches to accept the Redirection URL not just from the CPPM Server, but from other remediation portals for host integrity compliance on AOS 8.1.1 Switches using the Allowed Server(s) configuration.
Configuring a ClearPass Server
Click on the Create icon. Complete the fields as described below, then click on the Create button. When you are finished, select the checkbox next to the server and click on the Apply to Devices button to assign the server to switches on the network. Note that certain key fields are pre-filled with default values. It is recommended that you use the default values for these fields.
Management
- Server Name: The CPPM Server name (pre-filled with the default ClearPass Server).
- IP Address: The IP address of the CPPM Server.
- User Name: The Administrative login for the CPPM Server.
- Password: The password for the CPPM Server.
- Poll Interval: The number of Minutes/Hours/Days to poll the CPPM Server for information (pre-filled with default of 30), and the poll interval unit: Minutes/Hours/Days (pre-selected with default Minutes).
Database
- Database Port: The port used to connect to the CPPM Database (pre-filled with default 5432).
- Database Name: The CPPM Server Database name (pre-filled with default insightdb).
- Database User ID: The CPPM Server Database username (pre-filled with default appexternal).
- Database Password: The CPPM Server Database password.
RADIUS Server
- Shared Secret: The CPPM Server Shared Secret.
- Confirmed Shared Secret: Re-enter the CPPM Server Shared Secret.
- Backup IP Address/Host Name: The CPPM Server can optionally have a backup server. If you wish to define a backup server that will be used if this server is unavailable, enter the IP address OR Host name of the backup server.
- Timeout: The number of seconds a switch will wait before a request to the CPPM Server is timed out.
- Retries: The number of retries a switch will attempt when trying to contact the CPPM Server.
- Authentication Port: The port you to access the server.
- Accounting Port: The port used for accounting information.
Redirect Options
The redirect option is only supported on OS6860 Switches (AOS 8.1.1.R01 and later).
- Proxy Server Port: The HTTP proxy port number to use for redirection for Guest user login. (Range = 1024–49151, Default = 8080)
server.
- Allowed Server: The
In addition to the CPPM server, other servers can be added to the 'Allowed Server' list to enable additional redirections for Health and Posture checks.
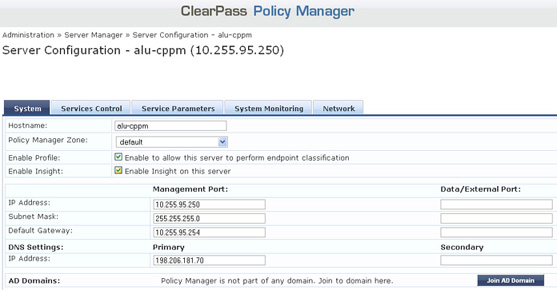
Note: The Insight Database must be enabled on the ClearPass Server for OmniVista to gather Locator information. In the CPPM application, go to: Administration - Server Configuration, then click on the Server in the table to bring up the following screen. Make sure the Enable Profile and Enable Insight checkboxes are checked.
Assigning a ClearPass Server
OmniVista will configure CPPM as a RADIUS Server on the selected switches. It also sets 802.1x authentication, MAC authentication, and accounting to point to the CPPM RADIUS Server entry. It also sets Redirect Server to be the CPPM Server, allowing the switch to accept redirect messages from the RADIUS Server for Captive portal (Web) authentication with CCPM.
On CPPM, the selected switches will be added to the list of Network Access Devices (NAD) with the CoA flag and CoA port. The result is the successful pairing of the CPPM Server and the switches. If specified, Allowed Servers are also configured on AOS 8.1.1 switches.
When you click the Apply to Devices button, the Assignment Screen appears. Configure any options, as described below, then use the "Assign Switch" Add/Remove buttons to select the switch(es) and click Apply or Override. ("Override" will override any previous configurations.)
- ClearPass: The name and IP address of the CPPM Server (informational only, not configurable).
- Vendor Name: Select a vendor to automatically enable the RADIUS dictionary associated with that vendor. Note that the IETF dictionary containing the standard the set of RADIUS attributes is always loaded and is generally used. (Default = IETF)
- CoA Port: The UDP port used to send CoA actions (Default = 3799).
- Enable Endpoint Profiling - Enables/Disables the IP Helper function on switches assigned to a ClearPass Server so DHCP request information can be forwarded to ClearPass for endpoint profiling.
Editing a ClearPass Server
Select the ClearPass Server you want to edit and click on the Edit icon to bring up the "Edit ClearPass Server" Screen. Edit the fields as described above then click on the Save button to save the changes to the server.
Deleting a ClearPass Server
To delete a ClearPass Server(s), select the server(s) in the table and click on the Delete icon, then click OK at the confirmation prompt.
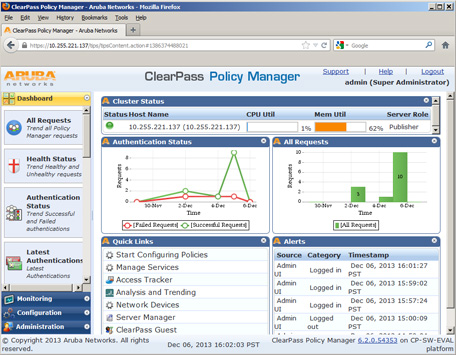
Launching the ClearPass Web Interface
Once the connection to the CPPM Server has been configured, click on the Launch button
to launch the ClearPass Policy Manager web interface. This is where you will configure
ClearPass authentication and network access policies. See the ClearPass Policy Manager
On-Line Help for ClearPass configuration information.