The Users and User Groups Authentication Server Screen is used to select the Login Authentication Server. You can select the local OmniVista Server (Local) or a remote RADIUS Server. Select the server from the Authentication Server drop-down list and click on the Apply button. If necessary, click on the Add icon to go the RADIUS Server Management Screen and configure a remote RADIUS Server. (After creating the server, you will automatically be returned to the Authentication Server Screen.)
Select the server from the Authentication Server drop-down list. If you select a server other than "Local", select an Authentication Method for communication between the remote server and OmniVista (PAP, CHAP, MSCHAP, MSCHAPV2, or EAP - MSCHAPV2).
If you select a remote server you must also verify connectivity to that server by clicking on the Test Radius Server Connection button and entering your RADIUS User Name and Password for the selected server. (You can also enter the User Name and Password of any user configured on the selected Server.) This is to ensure that the selected RADIUS Server is reachable and is configured correctly for OmniVista remote authentication. Enter your RADIUS Server User Name and Password and click OK. OmniVista will ping the server and verify connectivity and configuration. If successful, the Apply button will activate. Click on the Apply button to set the new server. If the server is unreachable or not configured correctly, the Apply button will not activate and you will not be able to change the server.
See the sections below for steps on configuring an External RADIUS Server or a CPPM RADIUS Server for authentication.
Notes:
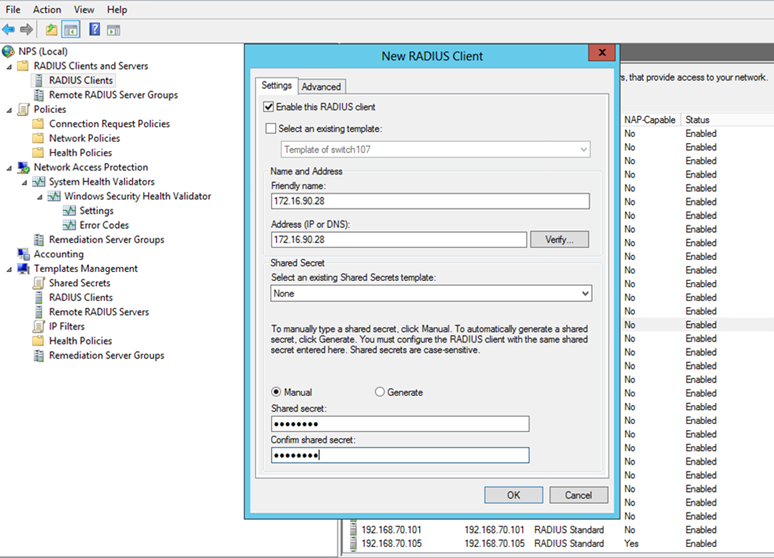
1. Add a new RADIUS Client (e.g., 172.16.90.28).
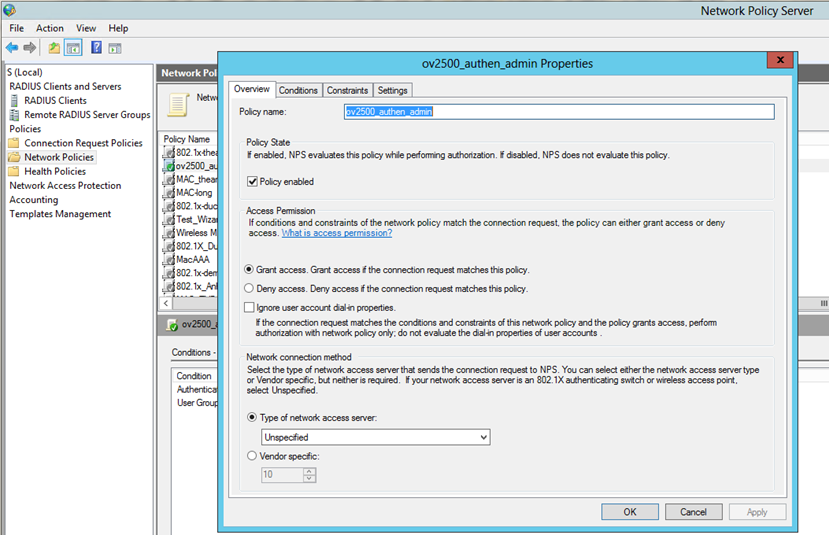
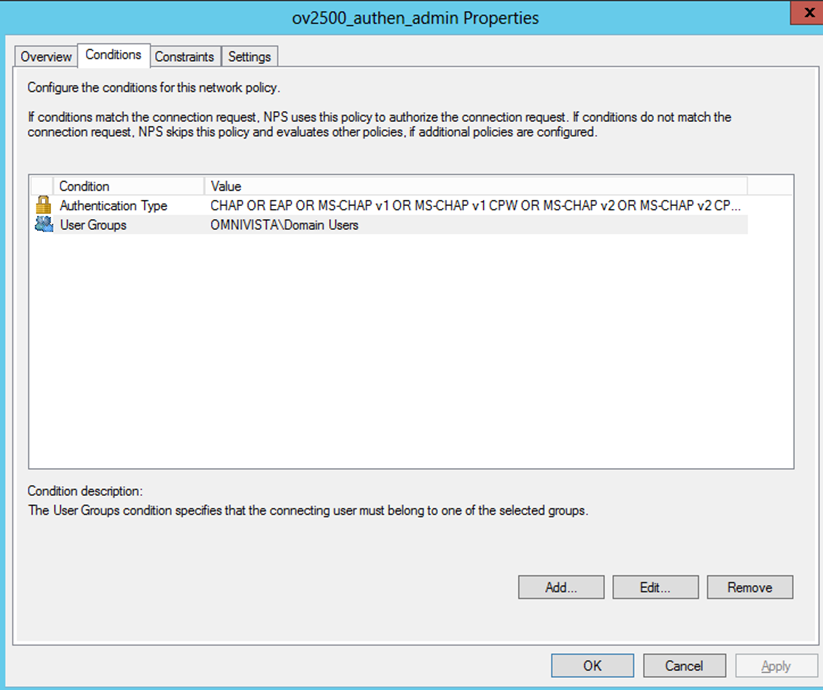
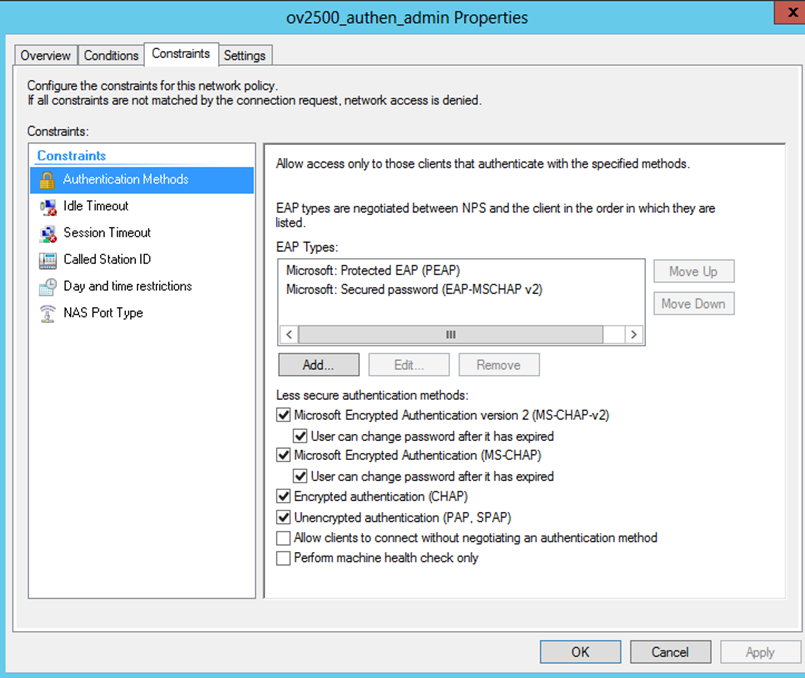
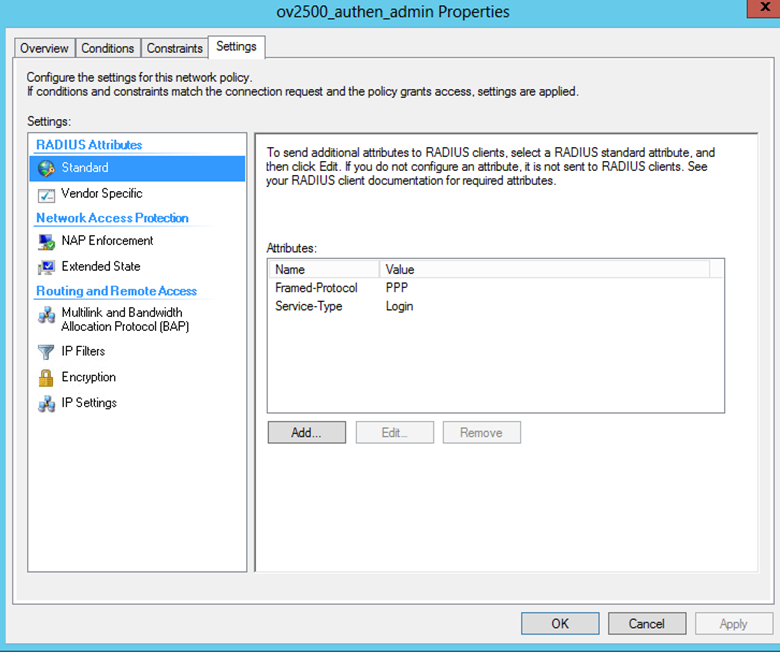
2. Configure some conditions for this Network Policies.
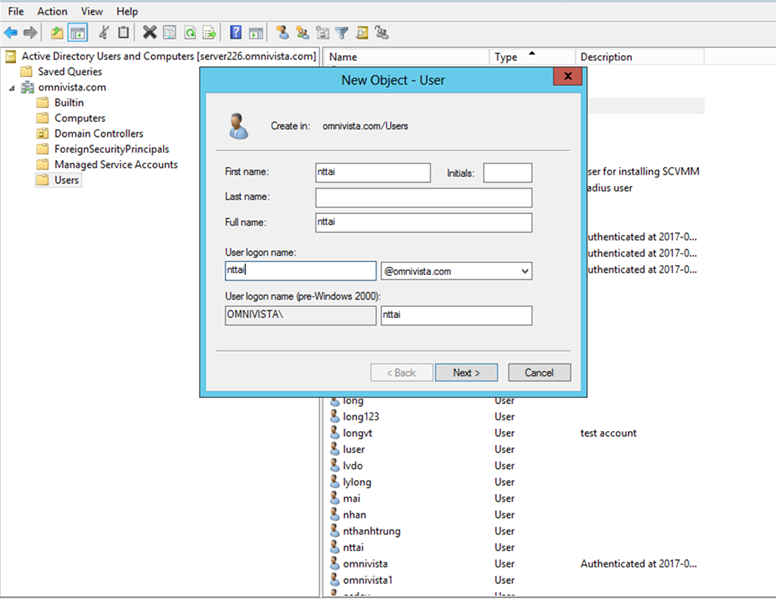
3. Create user.
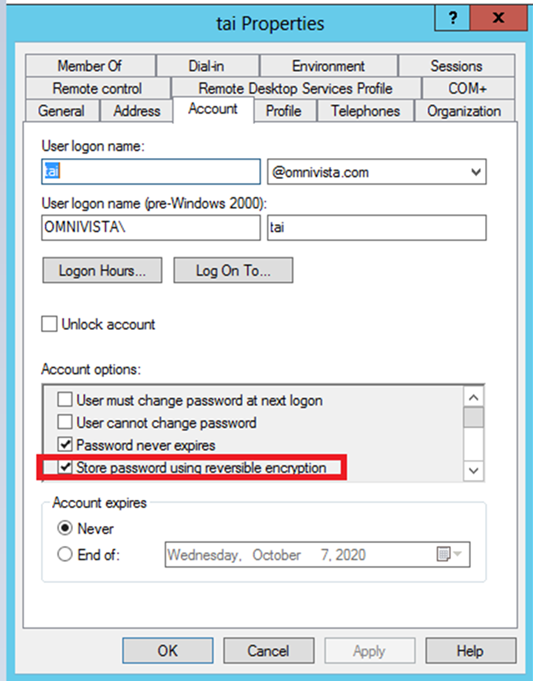
Note: Users need to enable storage of a reversibly-encrypted form of the user's password for authentication using CHAP.
- Go to Active Directory Domain Services - Active Directory Users and Computers - Domain (e.g., scc.seeg.com) - Users.
- Double click the user who is going to use the CHAP Authentication Protocol. Click on the Account Tab. Select Store password using reversible encryption. Click OK.
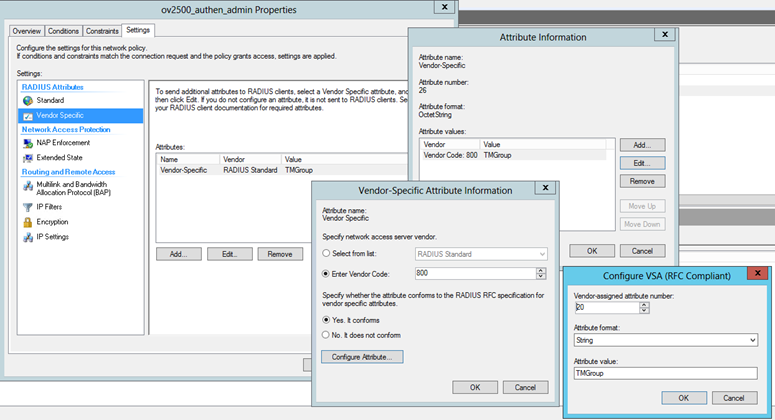
1. Update the RADIUS Dictionary Alcatel-Lucent Enterprise by adding attributes:
<Attribute profile="in out" type="String" name="Alcatel-Nms-Group" id="20"/>
<Attribute profile="in out" type="String" name="Alcatel-Nms-First-Name" id="21"/>
<Attribute profile="in out" type="String" name="Alcatel-Nms-Last-Name" id="22"/>
<Attribute profile="in out" type="String" name="Alcatel-Nms-Description" id="23"/>
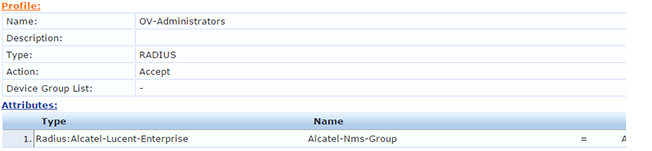
2. Configure an Enforcement Profile for the Administrators Group.
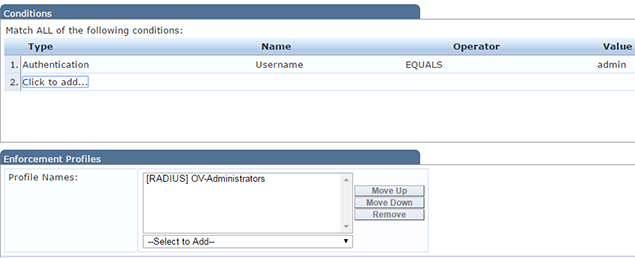
. 3. Configure an Enforcement Policy for the Administrators Group.
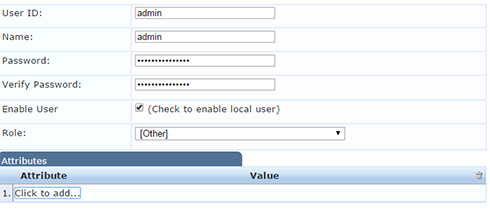
4. Create a Local User “admin” with any password on CPPM.
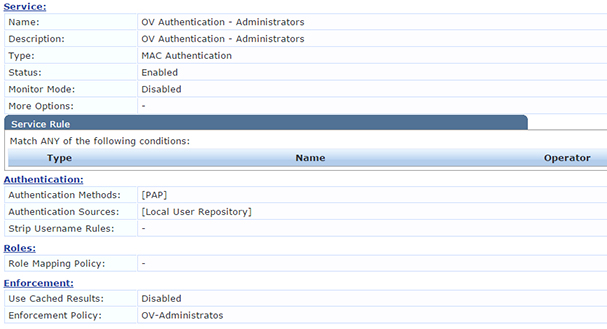
5. Create an Authentication Service on CPPM with “PAP” Protocol, “Local User Database”, and Enforcement Policy for the Administrators Group.
6. Configure as RADIUS Client for OmniVista on CPPM and RADIUS Server on OmniVista.
7. Choose CPPM RADIUS as the Authentication Server for OmniVista and try to login with a user from CPPM.